• Skip to primary navigation
  • Skip to main content
  • Skip to primary sidebar

Rock a Little Travel

Helping busy people travel more

  • Home
  • Start Here
  • Destinations
  • Travel Tips
  • Blog
  • About Me
  • Where I’ve Been
  • Contact
  • Privacy Policy

Eden Fite

10 Things to Do with One Day in Austin

February 9, 2020 By Eden Fite

Things to do in Austin

Planning a visit to Texas and have just one day in Austin? Keep reading, this post is for you.

Austin is easily one of the most exciting cities in the country to visit right now.

Aside from having designated itself the Live Music Capital of the World, it’s also the place to be to experience the latest in food, art, and entertainment.

There is so much to do, see, and eat, in and around Austin, you could be there for weeks and not get bored.  

I put together this One Day in Austin itinerary to help you cover as much of the city as possible with limited time.

Let’s go.  

Some of the links in the post are affiliate links. If you make a purchase through these links it helps to support this site at no extra cost to you.

Top 10 Things to Do with One Day in Austin

1. Austin Food Scene

The food scene in Austin is off the charts.

From Texas-style BBQ to breakfast tacos to fried chicken, you can find all kinds of fantastic things to eat.

Even if you’re only spending one day in Austin, you can’t miss your chance to try the food here.

If you’re looking to sample lots of places during your visit, I recommend taking a food tour or hitting up one of the many food truck parks around town.

There are several food truck parks located within a few blocks of each other in the South Congress area if you’d like to maximize your time and have plenty of options. 

Here’s some more Austin food scene inspiration for your trip. The host visits some restaurants a bit off the radar that you don’t want to miss.

20180919_120247

2. Visit the Stevie Ray Vaughan statue

If you happen to be a Stevie Ray Vaughan fan, make sure you stop by the memorial statue at Auditorium Shores Park.

The statue is located along the biking trail that runs along the river.

It is probably one of the most photographed landmarks in the city. Plus, the location of the statue is also offers the perfect view of the city and the river.

The Stevie Ray Vaughan Memorial Statue can be found in Google Maps. Just do a quick search to find the walking directions.

One day in Austin

3. Austin Music Scene

One of my favorite things about Austin is the music scene. If you’re a music fan of any kind,  you’re going to love it here.

Austin has one of the most exciting music scenes in the country right now, if not the world.

The city is home to over 200 live music venues and several of the largest music festivals including South by Southwest (SXSW), Austin City Limits, and Blues on the Green.

There are clubs and music venues spread throughout the city, but you can find many of them along either South Congress or 6th Street.

Some of the more popular venues include Stubb’s Bar-B-Q, The Continental Club and Antone’s Nightclub. 

A live concert is also the perfect end to your one day in Austin.

4. LBJ Presidential Library

If you’re into history or politics, I encourage you to pay a visit to the Lyndon Baines Johnson (LBJ) Presidential Library during your one day in Austin.

The LBJ Presidential Library is one of about 44 presidential libraries (though some are not called libraries) across the United States.

If you have never been to one before, the LBJ Presidential Library makes a great introduction.

The library is located close to downtown so you don’t have to go out of your way to visit.

Details for visiting the LBJ Library

The exhibits are well-curated and interesting, so even those less interested in history and politics will have no problem keeping their interest.

Fortunately for LBJ, he was president during an exciting time in American history and his library reflects that nicely.

The core exhibits at the library highlight President Johnson’s impact on the country from the War on Poverty to the passing of the Civil Rights Act and everything in between.

In addition to the many ongoing core exhibits, the LBJ Presidential Library has a temporary exhibit on view through January 13, 2019, called Get in the Game – The Fight for Equality in American Sports. 

This is a thought-provoking exhibit examining the impact of social justice in sports.  If you’re a sports fan this exhibit alone will be well worth your time. 

The LBJ Presidential Library is open daily from 9:00 a.m. to 5:00 p.m., except for some holidays.

Admission to the library is $10 for adults with lower admission prices available for some visitors.

For more information about the LBJ Presidential Library please click here. 

5. Water Activities

Austin is fortunate to be surrounded by many water sources creating unlimited opportunities for water-related sports and activities.

Here are several destinations to consider if you’re looking to participate in water-related recreational activities during your one day in Austin:

  •  The Colorado River: The Colorado River runs right through the heart of Austin and right under the Congress Avenue Bridge (where you’ll find the bats!). Activities available along the Colorado River include kayaking, canoeing, paddleboarding, and river cruises. 
  • Lady Bird Lake: Located just east of the Congress Avenue Bridge, Lady Bird Lake is a man-made reservoir created from the Colorado River. Activities available on Lady Bird Lake include kayaking, canoeing, and paddleboarding. 
  • Barton Springs Outdoor Pool: The Barton Springs Pool is located in Zilker Park across the river from downtown Austin. The pool has been filled with water from nearby natural hot springs and is open year-round. The Barton Springs Pool is available for swimming only, paddleboards, canoes, and kayaks are not permitted. 
  • San Marcos River and Comal River: The San Marcos River and Comal River are great destinations if you’d like to try river tubing, a very popular activity in Austin. There are several tour companies that will take care of all the details for you, including pick up and drop off right from downtown Austin. These companies even provide the tubes and coolers for your beer! If you’d like more information about the river tubing excursions near Austin, check out ATXcursions or Texas State Tubes. 
  • Lake Austin: Lake Austin is popular for fishing and boating. Visitors can rent canoes, sailboats, pontoon boats, and large party boats.
One day in Austin - Texas State Capital

6. Visit the Texas State Capitol

The Texas State Capitol is one of the most popular tourist destinations in Austin.

The capitol building is the largest in the United States, even larger that the U.S. Capitol building in Washington D.C.

The building also features beautiful ornate architecture including massive brass chandeiers and door hinges (trust me, it’s cooler than it sounds).

Apparently the door hinges are so amazing that multiple people have attempted to steal them over the years.

Fortunately they have not been successful, so you too can enjoy the beautiful door hinges.

Once you’ve finished exploring the interior of the Texas State Capitol, head outside to wander around the capitol grounds.

The capitol sits on 22 acres of well manicured lawns with historic buidlings and 17 monuments.

You can get a map of the outdoor capitol grounds from inside at the Visitors Center.

There are also a few restaruants on the capitol grounds. I hear the Clay Pit is a fantastic spot for Indian cuisine if you’re looking for a lunch spot.

If you would like to take a tour of the Texas State Capitol, they depart every 30 to 45 minutes from just outside the tour guides office inside.

The tours are free of charge and last approximately 30 minutes.

One day in Austin - Mural

7. Find the murals

Austin is an artsy city and just so happens to be full of dozens of fun, full sized wall murals. These murals make the perfect backdrop for some photos as you’re out exploring the city.

The first image in this post is one of the most popular wall murals in the city. You can find it on the side of the Roadhouse Relics building at 1720 S. 1st in Austin.

There are also plenty of murals along South Congress Avenue if you’re looking for more.

In all honesty, you’ll find plenty of murals just out exploring the city. But if you’d like to make a DIY Austin wall mural tour, you can do that too.

Just be sure to wear clothes you like to be phtographed in for all those pictures.

Austin Ghost Tour - The Driskill Hotel
Austin Ghost Tour – The Driskill Hotel

8. Take an Austin Ghost Tour

If you want to learn some unique and interesting history during your one day in Austin, consider taking an Austin Ghost Tour.

These tours will take you to locations around the city thought to be haunted. Whether they are hauted or not, who knows, but each location came with a dark and fascinating story.

During my visit to Austin I took the Ghosts, Murders, and Mayem tour with Maverick.

The tour was super fun and we went to several spots around downtown Austin including one of the country’s most famous haunted hotels, The Driskill.

Austin Ghost Tours offers three different tours around the city: Ghosts, Murders, and Mayem, Alleyways and Shadows Ghost Walk of the Capitol, and a Historic District Ghost Walk.

All tours last about 90 minutes and cost $23 per person, tip not included.

Flight of beers on wooden rack

9. Enjoy the nightlife

The perfect way to end your one day in Austin is by enjoying the local nightlife.

There’s so much going on in Austin on any given night, you’re sure to find something fun to do.

If you’re a beer enthusiast, consider visiting some of the east Austin tap rooms. Here’s a quick list to get you started:

  • Austin East Ciders: I’ve been really into ciders lately after finding so many in Europe. This place has a lot of different flavors and you can get flights to try several at a time.
  • Zilker Brewing Company and Taproom: Zilker is the perfect place to hang out for the evening after exploring the city. They have a large tap room with art, music, and great food.
  • Hops and Grain Brewing: Hops and Grain is another great option for visiting beer lovers. In addition to their many beers, they have a rotating selection of local events and food trucks.

In addition to the east side taprooms, you’ll find tons of great bars in and around Austin. Watch this video above to find some really cool bars to choose from.

Or, you can always let fate play it’s part and just stop in somewhere at random. Sometimes that’s when you find the best, most unexpected things.

People watching bats leaving the Congress Ave bridge at sunset in Austin, Texas.

10. Congress Bridge Bats

Just about every visitor to Austin wants to see the famous Congress Avenue Bridge bats.

If you have not yet heard about these bats, you’re in for a real treat. (That may be a poor choice of words.)

Austin happens to be home to the largest urban bat colony in the world.

There are over a million and a half Mexican free-tailed bats living under the Congress Avenue Bridge.

Every night at dusk, you can watch the bats emerge in a massive swarm as they head out over the river to feast on insects and mosquitoes. 

It is estimated that over 100,000 people head to Austin to watch the bats each year. Here are a few options for viewing the bats during your one day in Austin.

Where to see the bats

  •  Sit on the lawn or stand on the bridge – The easiest way to see the bats is to stand along the Congress Avenue Bridge or grab a space on the lawn near the Statesman’s Bat Observation Center. It is recommended that you arrive at least an hour before dusk to claim your spot. 
  • Take a boat tour – There are two companies offering boat tours to see the bats. Contact either Capital Cruises or Lone Star Riverboat for information and reservations. Both boat tours last approximately one hour and cost about $10 per person. The tours are scheduled to leave 30 minutes before sunset and return shortly after the bats have emerged from the bridge. 
  • Canoe, kayak or paddleboard – You can also rent a canoe, kayak or paddleboard from one of the many vendors along the waterfront. These rentals typically only cost a few dollars and will allow you to get as close as you want to the bridge. 

No matter which position you choose, be sure to have your camera ready. Nobody is going to believe you went all the way to Austin to watch a million bats emerge from under a bridge.

I hope you’ve enjoyed this one day in Austin itinerary and that it helps you plan your visit to this wildly fun city. If you enjoyed this post, please consider sharing it. It really helps me a lot. Thanks for reading.

Book Your Trip

Find the best flight deals by using Google Flights, then book direct with the airline. This is the search engine I use to compare flights and prices before booking my own trips.

BOOK YOUR ACCOMODATION
I recommend searching for hotels through Booking.com to compare hotels on amenities, location, and price. If you are a member of a hotel’s rewards program, always book direct with the hotel. If you are not loyal to a specific hotel brand, using Booking.com for the best price.

TRAVEL INSURANCE
Travel insurance is more important than ever. For just a few dollars a day you can protect yourself and your trip. I personally use World Nomads, but whomever you choose, don’t skip out on travel insurance. It can literally save you thousands of dollars.

Want to save it? Pin it.

One day in Austin Pinterest Pin

Related Posts

Sedona Road Trip

The Ultimate Phoenix to Sedona Road Trip Itinerary

If you’re looking for some adventure on your Phoenix to Sedona road trip, this post will guide you to all the best stops along the …
Read More
Getaway House Big Bear

My Getaway House Big Bear Review

Is Getaway House Big Bear is worth the hype? Let’s find out. Just last week I booked a last minute stay at Getaway House …
Read More
Best time to visit Joshua Tree

Best Time to Visit Joshua Tree National Park

While the best time to visit Joshua Tree National Park depends on what you’re looking for, there are a few important considerations when planning your …
Read More
Rock a Little Travel
Eden Fite
Part-time Traveler | Dog Lover | Avoider of Crowds

I help busy people find creative ways to travel more.

Filed Under: United States Tagged With: Austin, Texas

Top 15 Tips for Finding Cheap Flights

June 3, 2019 By Eden Fite

Tips for finding cheap flights
Photo by Anya Berkut

Airfare is typically the largest upfront expense we face when making travel plans. However, there is a lot you can do to lower the cost of airfare if you plan ahead and have a little patience.

These days, there are so many tools out there you can use to track and find great airfare deals, but it can also be overwhelming. In this post, I’ve narrowed down the process for finding cheap flights based on experience from booking my own flights.

All of these tips for finding cheap flights are the same steps I take when searching for and booking my own cheap flights. 

I hope you find these Tips for Finding Cheap Flights helpful, and that you save a ton of money so you can afford more flights. 

Tips for Finding Cheap Flights

Tips for finding cheap flights on Google Flights

1. Use Google Flights

I believe any search for airfare should begin with a search on Google Flights.  One of the best features of this site is the calendar that shows airfare prices by date.

You will often see that you can often save hundreds of dollars just by traveling a day or two earlier or later. You will also be able to see prices for nearby airports. Sometimes flying into a suburb is cheaper than flying into the metropolitan area, but not always. 

I recommend beginning any search for airfare as soon as you know you will be traveling. There is significant fluctuation in airfare prices throughout the year.

Use the tracking feature that Google Flights offers to monitor the price of the flight you want to take so you can purchase when the price for the flight you want is at its lowest. If you’re really looking to save money, try monitoring several flights that fit your travel plans.

For example, you can track flights on different dates, different time, and different airlines. This will give you the most opportunity for scoring a great deal. 

Using Google Flights is my favorite of these tips for finding cheap flights. This is exactly how I find and book my own flights. If you do only one thing from this list, make it that you start your search with Google Flights. 

2. Use a Secondary Flight Search Engine

Once you have found a couple of flights that work with your travel plans, do a secondary search on some of the other flight search engines. I recommend Momondo, Skyscanner, and Kayak.

On occasion, I have found slightly better airfare deals on these sites after completing my initial search on Google Flights. If you have the time, you can conduct your search on all of these flight search engines and compare what you find.

This way, in the end, you can be sure you’ve found the best deal out there. 

Tips for finding cheap flights

3. Book Directly With the Airline if Possible

This is one of the most important of my tips for finding cheap flights, so whatever you do, don’t skip this step. Booking directly through the airline is the best way to protect yourself in the event of a delayed or canceled flight.

It will also be easier if you need to change your travel plans after making your reservation. For most of the secondary search engines, once you book your airfare it is non-refundable.

Some will offer you a credit of sorts if you need to cancel or switch flights, but they may make it nearly impossible for you to use it (Orbitz comes to mind. Never book with Orbitz!).

Another important thing to note is that the ticket price you find on these booking sites will also be available directly through the airline. In fact, many times, when I’ve gone to the airline’s website to book directly, the price has actually been a few dollars lower.

I’ve found that booking sites will sometimes round up on the ticket prices they find on the airline websites, so you’ll usually save at least a couple dollars by booking direct. 

Booking directly with the airline alleviates the middleman in the event there are any issues. It is much easier to modify a flight or get a refund if you are only dealing with one business.

In addition to just being easier, you will also get credit for your miles if you are a member of their loyalty program. 

4. Join the Loyalty Program

Always join the loyalty program of any airline or hotel you frequent. You will acquire points for every purchase you make and every flight you take.

These frequent flier miles will eventually add up and can qualify you for upgrades or free flights. Even if you don’t fly a lot, it’s worth joining the loyalty program to ensure you aren’t missing out on the benefits. 

Equally important, do not forget to provide your loyalty number when you book your future flights.

If you don’t give them your loyalty account number, you will not get the points or credit for your flight or purchase. You don’t want to miss out on free flights or upgrades, so try to stay on top of this. 

One more thing. Do not forget about your loyalty program memberships. So many people sign up for loyalty programs, earn tons of points, and then never use them. Sometimes people will just forget, sometimes people don’t know what to use them for, and some just don’t want the hassle.

I totally understand all of these things, life happens. Just don’t let this happen to you. Keep a note in your phone with your loyalty program information so you have it on hand and can access it when you need it.

Easy Jet sitting on a runway

5. Beware the Budget Airline and Baggage Fees

Don’t forget there are many budget airlines out there offering tremendously low fares. To make up for these fares they charge steep fees for selecting seats, carry-on bags, and checked bags.

Easy Jet is one that comes to mind, though most airlines are now charging additional baggage fees. Always check the airline’s website for the actual cost of the flight with any bags you intend to bring with you. 

To do this, I usually start going through the booking process a bit, just to the page where baggage fees come up. This way you can view the actual fare and determine whether you’ve found a good deal or not. 

While I encourage you to be mindful of the high fees associated with budget airlines, they are often an excellent and affordable way to get from city to city in Europe. Hopefully, this will catch on in the United States sometime soon. 

6. Be Flexible with your Destination

One of the biggest money-savers from this list of tips for finding the cheapest flights is to be flexible with your destination. Depending on what time of year you are looking to travel, there are going to be some destinations that will be in their peak season for tourism.

For example, if you want to visit Italy in June or July, be prepared for both large crowds and high prices. Airfare will be very expensive this time of year. If you know you want to visit Italy, consider looking for airfare in the spring or fall when better deals can be found.

If you want to travel in the summer months, visit destinations that are experiencing their off-season or shoulder season. You can save a lot of money on airfare this way, not to mention lower hotel costs and lighter crowds. 

7. Be Flexible with your Dates

Once you begin using Google Flights for your airfare research, you’ll quickly discover that flying on weekends and holidays is almost always more expensive. Whenever possible, go into your airfare ticket search with an open mind.

Be flexible with the dates you fly our and return if you can. You’ll often find that moving your departure or return date by a day or two can save you hundreds of dollars. 

8. Be Flexible with your Flight Times

You can often score some great flight deals by flying at times that others just don’t want to fly. These will usually include nights and early mornings.

If you’re able to fly during these times, take advantage of it. You’ll see some really great deals this way with Southwest Airlines especially. They always offer lower fares for their late night and early morning flights. 

I find this option is really convenient when planning weekend getaways. Instead of flying out on Friday when my weekend begins, I’ll book a late-night flight on Thursday after work. This way I’m already in my destination and ready to go on Friday morning. 

9. Avoid Flying During Major Holidays

When making travel arrangements in advance, try to avoid plans that involve flying over the holidays. In the United States, airfare is particularly expensive over Thanksgiving, Christmas and New Year’s Eve.

If you can, try to book flights at least two weeks ahead of these major holidays. In some cases, cheap flights can be found if you fly on the day of the holiday. For example, flights on Christmas Day or New Year’s Eve can sometimes be found at a big discount. 

In addition to the savings, you also don’t want to be in an airport during these holidays anyway. The lines will be long and airport security will most likely take forever. 

10. Plan Ahead Whenever Possible

While it’s true that last minute flight deals can be found, it’s more likely you will pay significantly more for your airfare if you wait until the last minute to book your ticket.

Try to start looking for your airfare as soon as you know you will be traveling. This will give you time to research flight costs, track flights, and find the best deals. If at all possible, try to book airfare about 2 to 3 months in advance for the best prices. 

11. Look for One-Way Tickets 

When searching for cheap tickets, try looking for one-way flights instead of round-trip tickets. I often find that booking tickets as one-way flights save me a lot of money.

When you do this, you are able to book the cheapest flights in both directions of your travel regardless of the airline. It also allows you to customize your flight times better instead of letting the airline pair up the flights for you.

This is something I do every single time I book my airfare, I never book a round-trip ticket. You’ll get so much more flexibility booking your flights separately. Plus you’ll have access to the best deals offered by all of the airlines, not just the one you booked your outbound flight with. 

12. Mix and Match Airlines

Don’t be afraid to mix and match airlines when booking flights from one destination to another. The more you travel, you’ll realize that some destinations are just more expensive to get in and out of.

This may be because they are in remote locations, or maybe they are just not high-traffic places to go. Either way, you may find better flight deals by booking with more than one airline. For example, traveling from Idaho to Los Angeles is much more expensive than traveling from Idaho to Las Vegas to Los Angeles.

Instead of paying $400 to fly from Idaho to Los Angeles I paid $50 to fly from Idaho to Las Vegas on Spirit Airlines and $95 to fly from Las Vegas to Los Angeles on American Airlines. 

You’ll find situations like this a lot. Be sure to take your time when booking your airfare and explore all options. 

Also, be mindful of layover times. If you book separate plane tickets on different airlines you want to make sure you have plenty of time on your layover to get to the next flight.

If your first flight is delayed and you miss your 2nd flight, you will not be reimbursed by either airline in most cases. Use this method wisely and consider all possibilities. 

13. Fly Economy

Unless you’re using frequent flier miles, traveling for business, or you are rich, there’s no reason to pay all that money to fly in first or business class.

Those fares are not meant for regular folks like us, which is why they are so unbelievably expensive. Those fares are often paid by large companies flying their employees around and don’t care that they are paying 10 times the cost of a seat on that same plane just a few rows back. 

However, if you have frequent flier miles, by all means, please take advantage of seat upgrades and great deals. I’d love to fly first class on an international flight one of these days but haven’t found the opportunity just yet. From what I hear, this can be quite a fun experience. 

14. Avoid Fees for Perks You Don’t Need

Airlines are charging fees for just about everything they can these days. This means you will likely have to pay extra to sit in certain rows, have an exit row seat, or even choose your seat altogether.

While sometimes these added perks are worth the few extra dollars, especially on a long flight, I recommend avoiding them whenever possible. If you’re flying from New York City to Boston, do you really need to pay an extra $50 to choose your seat?

Probably not, unless it’s really that important where you sit on the plane. For me personally, I like to save adding these extras for longer flights. 

15. Consider a Travel Credit Card

If you have good credit and know that you can be responsible for a new credit card, consider getting a travel credit card.

Travel credit cards allow you to earn points with the money you spend on your card. These points can then be redeemed for flights and hotels.

The best travel credit cards will allow you to earn multiple points per dollar for certain categories of purchases. These extra point categories are usually restaurant and travel-related purchase categories.

If you’re just getting started with travel rewards credit cards, I recommend starting with the Chase Sapphire Preferred.

This card has a low annual fee and comes with tons of travel perks and benefits. They are also currently offering an initial sign-up bonus of 60,000 Chase points after you spend $4,000 in the first 3 months.

The signup bonus alone is worth $750 towards travel expenses when purchased through the Chase Ultimate Rewards website.

I think the Chase Sapphire Preferred is the best starter travel credit card for just about anyone because it’s a great card for daily use. Just be sure to pay off your balance in full each month to avoid paying interest charges. These fees can quickly eliminate any benefit you get from the points you earn.

By now, you should be an expert at booking cheap flights. Down below I walk you through an example of how I search for airfare when booking my own flights so you can see these tips in action. 

Here is a sample search to show these tips in action

tips for finding the lowest airfare

In the image above I searched for a one-way fare from Los Angeles to London on November 14, 2018.

The search results show the four best flight options based on price and duration.

The top result is Norwegian Air at $205 cheaper than the next best price found with West Jet. From here, I select the Norwegian Air price to be taken to their website so I can see the ACTUAL fares. 

The image above shows the fare options once you arrive at the Norwegian Air website for booking. You can see that the $270 fare we found on Google Flights does not include seat selection, a meal, or a checked bag.

If you would like to include those options, the flight will actually cost you $359.  However, even after being charged for these extra services, the Norwegian Air flight is still more than $100 cheaper than the next best search result we found on Google Flights. 

For comparison, we’ll take that same search, one-way from Los Angeles to London on  November 14, 2018, to see if we can find a lower fare.

We can see from the search results on SkyScanner, that the cheapest flight is still the Norwegian Air flight. It shows the flight for $250 here, but remember, we already know this price does not include seat selection, a meal, or a checked bag.

If you want those extras included you would still be paying the $359 price we found direct with Norwegian.

if you have time before your trip, don’t forget you can use the price tracking feature from Google Flights. First, select the specific flight you want to track.

In the example above, I have selected the Norwegian Air flight on November 14, 2018.  Once you set up the flight tracker, you will be notified via email every time there is a change in price for that flight. 

Generally speaking, you want to book your flight about six to eight weeks ahead of time.

However, if you are traveling to a destination during their peak season, you will typically want to book the flight at least three months before your departure. 

My Final Thoughts on How To Find Cheap Flights

I think finding affordable airfare can be handled by just about anyone, and especially if you use these tips for finding cheap flights. As long as you have the patience to put in the effort, you should have no trouble finding a good deal no matter where you’re headed.

If you’d like to go the extra mile and you’re wondering how to get cheap flights last minute, I recommend signing up for Scott’s Cheap Flights.

They will send you airfare deals and mistake fare alerts a few times a week. You can often save hundreds of dollars if you’re truly flexible about your travel plans. This is one of the easiest ways to be notified of cheap flight deals to score cheap airline tickets. 

I hope you’ve found my Top 15 Tips for Finding Cheap Flights both helpful and easy to understand.

If you have any questions about finding affordable airfare head over to my contact page and send me a message. 

If you’re looking for more travel tips, like how to find the best hotel, I’ve got you covered. You can find all you need to know over on my Travel Tips page. 

Book Your Trip

Find the best flight deals by using Google Flights, then book direct with the airline. This is the search engine I use to compare flights and prices before booking my own trips.

BOOK YOUR ACCOMODATION
I recommend searching for hotels through Booking.com to compare hotels on amenities, location, and price. If you are a member of a hotel’s rewards program, always book direct with the hotel. If you are not loyal to a specific hotel brand, using Booking.com for the best price.

TRAVEL INSURANCE
Travel insurance is more important than ever. For just a few dollars a day you can protect yourself and your trip. I personally use World Nomads, but whomever you choose, don’t skip out on travel insurance. It can literally save you thousands of dollars.

Want to save it? Pin it. 

Tips for finding cheap flights

Related Posts

Getaway House Big Bear

My Getaway House Big Bear Review

Is Getaway House Big Bear is worth the hype? Let’s find out. Just last week I booked a last minute stay at Getaway House …
Read More
Dubai Miracle Garden

Your Ultimate Guide to Visiting Dubai Miracle Garden

Visiting the Dubai Miracle Garden was one of my favorite activities during my recent trip to Dubai. Prior to my visit I had read a …
Read More
Affordable off season travel destinations

12 Affordable Off Season Travel Destinations

Looking for some affordable off-season travel destinations? As a frequent traveler and travel blogger, I do most of my own traveling in the shoulder season …
Read More
Rock a Little Travel
Eden Fite
Part-time Traveler | Dog Lover | Avoider of Crowds

I help busy people find creative ways to travel more.

Filed Under: 44, Travel Tips Tagged With: cheap airfare

Puerto Viejo to Bocas del Toro the Easy Way

April 17, 2019 By Eden Fite

Puerto Viejo to Bocas del Toro

If you’re planning the trip from Puerto Viejo to Bocas del Toro, and you want to go the easy way, then this post is for you.

Bocas del Toro can be found in the northernmost region of Panama located along the border with Costa Rica.

It sits along the Caribbean coast of Central America so it’s quite a popular beach destination, especially for backpackers and budget travelers.

There are several islands that make up the Bocas del Toro province, and visitors can easily travel between them. 

The trip from Puerto Viejo to Bocas del Toro is a fun one, so I hope you get the chance to make the journey.

I’ve broken the trip down into several steps to help you understand and navigate the border crossing process, so let’s get to it. 

Puerto Viejo to Bocas del Toro – A Step by Step Guide

Puerto Viejo, Costa Rica
Photo by Tiago Fernandez

Step One: Make your shuttle reservation online

The easiest way to get from Puerto Viejo to Bocas del Toro is to take a shuttle.

The shuttle service is both economical and convenient. For just $34 the shuttle will pick you up right from your hotel or hostel in Puerto Viejo, take you through the entire border crossing process, and deliver you to the dock in Bocas del Toro.

The entire trip will take about 4 hours in total, from door to dock. 

Once you decide which day you want to make the trip to Bocas Town, you’ll want to make your reservation online with Caribe Shuttle.

They are extremely reliable and have been around forever. I recommend making your reservation online in advance if possible, but you can usually secure a spot just a few days out if you’re flexible about what time you leave in the morning.

Shuttles depart daily from Puerto Viejo at 6 am, 8 am, and 12 noon. 

Step Two: Be ready for your shuttle on the day of your trip

On the morning of your trip, plan for your pick up window to be about 20 before or 20 minutes after your scheduled departure time.

You will not know how many other travelers the driver will need to pick up or in what order.

Your best bet is to be ready to go a little early, but expect that your driver might arrive a little late. Out of respect for your fellow travelers, try to be ready to go when the driver arrives. 

Step Three: Drive to Sixaloa

Once your driver has picked up all the passengers, you will begin to make the drive to the border town of Sixaloa.

The drive will take about 45 minutes. Once you arrive in Sixaloa, you will hop out of the shuttle and grab your bags.  

Step Four: Pay an exit fee at Costa Rica Immigration

Once you’ve got your bags, you’ll head over to the Costa Rica immigration building.

Your shuttle driver will take you where you need to go so you don’t get lost. Once you find your way to Immigration, you will need to pay a $7 exit fee to Costa Rica.

They will give you a receipt for this payment which you will need to present later, so hold onto this receipt. 

Sixaloa Bridge border crossing between Costa Rica and Panama

Step Five: Cross the Sixaloa bridge

After you’ve paid your exit fee with Costa Rica immigration you get to cross the famous Sixaloa Bridge.

The bridge pictured above is the old crossing but has since been replaced by a more modern bridge. It used to be quite the adventure to get across.

The original bridge had uneven surfaces and missing boards back in the day. The new bridge is paved, so if you have a roller back with you, you should be just fine. 

At this point in the trip, your first shuttle driver will introduce you to your second one.

Your Costa Rican driver cannot cross the border with you, so you are getting handed off to a Panamanian driver who will assist you in navigating the remainder of the border crossing process. 

Step Six: Go through Panama Immigration and Customs

Once you’ve crossed the Sixaloa Bridge with your new driver, you’ll be taken over to the Panama Immigration and Customs building.

Be sure to have your passport, Costa Rica exit receipt, and onward travel documents ready to show at the border. Here they will stamp your passport and take your picture.

They may or may not ask for onward travel documents, but be sure to have these ready just in case.

For most people, this will be an airplane ticket out of the country or a shuttle reservation back to Costa Rica. 

Step Seven: Take the shuttle to the pier in Alimante

Once you’ve cleared immigration and customs into Panama, your driver will take you to your shuttle.

Once settled in your new shuttle, you will begin your drive to the pier in Almirante. The drive from the border to the pier will take about one hour. 

Almirante pier in Panama

Step Eight: Take the water taxi to Bocas del Toro

Once you get to the pier in Alimante (pictured above), you will board one of the water taxis to get to Bocas Town.

If you didn’t take the Caribe Shuttle and you get there on your own, the cost is about $6 per person. If you’re with Caribe Shuttle, the boat ride is included in the price you paid.

Boats depart about every half hour, and the ride will take approximately 30 minutes. I recommend bringing a hair tie if you have long hair, it gets super windy on the boat. 

Once you’re on the boat, you can just relax and enjoy the short ride. This was my favorite part of the trip from Puerto Viejo to Bocas del Toro. It’s not every day you get to take a boat to your hotel. 

Bocas del Toro dock

Step Nine: Arrive at the Bocas Town dock

Once you arrive at the dock in Bocas Town you should be able to walk to your hotel or hostel.

Bocas Town itself is quite small, so you would only be walking a few short blocks at the most. If you have reservations for lodging on another island in the vicinity, you can arrange for another water taxi from this same dock.

This additional water taxi should only cost a few dollars. There will be guys with small boats hanging around the dock. If you’re too shy to ask for a ride, just look around. I promise you, someone will offer you a ride. 

How to get from Puerto Viejo to Bocas del Toro on the public bus

If for some reason you prefer to take a public bus instead of the Caribe shuttle, here’s how to do it. 

  1.  Catch the bus to Sixaloa from the bus station in Puerto Viejo. The bus fare will cost about $3. The ride to Sixaloa will take about one hour. Buses depart every hour starting at 6:30 a.m. The last bus departs at 7:30 p.m during the week and 6:30 p.m. on Sundays and holidays. 
  2. When the bus drops you off in Sixaloa, head over to the Costa Rica Immigration building to pay your exit fee of $7. Keep your receipt. 
  3. After paying your exit fee, make your way across the Sixaloa Bridge. 
  4. After crossing the bridge, head over to Panama Immigration and customs to show your passport and have your picture taken. 
  5. Once through Panama immigration, head over to the shuttle and bus area. From here you can either wait for the bus to the pier in Almirante or take a shuttle for about $5, or whatever you are able to negotiate. If you take a shuttle, the drive will be about one hour. If you prefer to take the bus, it will cost $3 and take about one hour and 40 minutes. 
  6. When you arrive at the pier in Almirante, you will need to pay $6 for a ticket, unless you negotiated the price to be included with your shuttle driver. Boats depart from the dock to Bocas del Toro every 30 minutes or so. 
  7. After 30 minutes you’ll arrive at the dock in Bocas del Toro and can walk to your hotel from here. If staying on another island, grab a water taxi at the dock for just a few dollars more. 

Once you arrive at the dock and drop off your bags, you’ll find there are plenty of fun things to do in Bocas del Toro.

If you haven’t made a lot of plans just yet, you can find lots of tours being sold near the dock. You’ll find everything from zip lining to island hopping, or even surfing. Either way, don’t forget to leave time for relaxing at the beach. 

What’s been your most interesting border crossing so far? Let me know in the comments below! 

Book Your Trip

Find the best flight deals by using Google Flights, then book direct with the airline. This is the search engine I use to compare flights and prices before booking my own trips.

BOOK YOUR ACCOMODATION
I recommend searching for hotels through Booking.com to compare hotels on amenities, location, and price. If you are a member of a hotel’s rewards program, always book direct with the hotel. If you are not loyal to a specific hotel brand, using Booking.com for the best price.

TRAVEL INSURANCE
Travel insurance is more important than ever. For just a few dollars a day you can protect yourself and your trip. I personally use World Nomads, but whomever you choose, don’t skip out on travel insurance. It can literally save you thousands of dollars.

Related Posts

Surf boards on a beach

Top 11 Things to Do in Puerto Viejo Costa Rica in 2022

With its rockin Afro-Caribbean culture, tropical climate and eclectic beaches, a trip to Puerto Viejo makes the perfect Caribbean beach destination.  There are lots of reasons …
Read More
Sloth in Costa Rica

10 Unique Things to Do in Costa Rica in October

Photo by Pixabay Want to know about things to do in Costa Rica in October? Perfect, that’s exactly what I’m here to share with you. While …
Read More
Puerto Viejo to Bocas del Toro

Puerto Viejo to Bocas del Toro the Easy Way

If you’re planning the trip from Puerto Viejo to Bocas del Toro, and you want to go the easy way, then this post is for …
Read More
Rock a Little Travel
Eden Fite
Part-time Traveler | Dog Lover | Avoider of Crowds

I help busy people find creative ways to travel more.

Filed Under: Costa Rica, Panama

The Ultimate Yosemite Road Trip

April 10, 2019 By Eden Fite

Yosemite Road Trip
Yosemite Road Trip

Yosemite National Park is located in California along the majestic Sierra Nevada mountains.

It’s famous for its massive rock formations, waterfalls, and giant Sequoias. Late spring or early summer is the best time to visit Yosemite, right before the big crowds show up. 

If you love road trips and enjoy visiting national parks, you’re in the right place. This road trip will take you to all the most popular spots in Yosemite, along with several most never see. 

At almost 1,200 square miles, there’s a lot to see and do in Yosemite. However, most visitors to the park spend the majority of their time in Yosemite Valley.

While you don’t want to miss this area of the park, I recommend making the effort to see the vast majority of the park that remains unseen by most visitors. 

So how do I see the rest of the park you ask? By making your very own Ultimate Yosemite Road Trip. 

Yosemite Road Trip – Important Information

Several important things to keep in mind before you begin your journey:

  • Both the Tioga Pass and Glacier Point roads are currently CLOSED due to an early snowfall but may reopen again for a short while before closing for the season. These roads usually reopen in late May. You can check the National Park Service website for updates here. Once cleared, these roads typically remain open until mid November. 
  • There are very few gas stations in Yosemite and these are located near the entrances to the park. It is recommended that you fill up your tank before you enter the park. There are no gas stations in Yosemite Valley. 
  • Emergency road service is available in the park 24 hours a day by calling 209-372-8320.

Yosemite Road Trip Details

This Yosemite road trip begins at the entrance to the park on Highway 41 just north of Oakhurst. This road trip includes 15 stops inside the park.

The road trip can last as long as you want it to, but I’d be sure to have at least 3 full days to visit all 15 stops. At the end of the road trip, you can leave the park from whichever exit you choose. 

Navigation inside the park: Most guests will be able to use Google Maps to navigate their way through the park.

The stop names included in this road trip can be found in Google Maps.

In the event that your reception inside the park is so bad, you cannot use Google Maps, you can use the park map you received from the ranger station when you entered the park. 

If you’re looking for a place to spend the night outside the park, there is a Best Western hotel in the town of Oakhurst.

Make your reservation as soon as possible. The hotel sells out fast, especially during the busy summer months. 

Mariposa Grove of Giant Sequoias

Stop 1: Mariposa Grove of Giant Sequoias

The Mariposa Grove of Giant Sequoias will be the first stop on your Yosemite road trip.

It’s located just inside the park’s south entrance. Park your car at Tuolumne Grove trailhead, walk 500 feet down the hill, and look up to see some of the tallest trees in the world standing before you.

One of the oldest and most famous trees, the Grizzly Giant, can be found a bit further down the trail. In addition to being one of the oldest trees, the Grizzly Giant is also the second-largest tree in the grove. 

As you continue your walk into the grove you will see the Faithful Couple trees up ahead. These two trees grew so close together their trunks have fused at the base.

You’ll also want to keep an eye out for the Columbia tree. At 285 feet tall, this is the tallest tree in the grove and the tallest tree in Yosemite.

You’ll find all these trees along with the two and a half-mile trail that winds through the grove. When you’re done, the trail takes you right back to the parking lot. 

Wawona Hotel in Yosemite National Park

Stop 2: Wawona Hotel

Just a few minutes further up the road towards Yosemite Valley, you will find the historic Wawona Hotel.

The hotel was a former mountain resort built during the Victorian-era in 1856. Today the hotel features 104 rooms decorated with antique furnishings, a spacious dining room, outdoor swimming pool, 9 hole golf course, and riding stables.

During the summer months have a popular Saturday night barbeque with music and entertainment which I highly recommend if your timing is right. 

The Wawona Hotel is a National Historic Landmark and worth taking the time to explore. Take a walk through the hotel and the grounds outside.

It’s a beautiful area and also a great spot to grab lunch if you’re hungry. To be honest, this is probably the last good meal you will have inside the park unless you brought your own food.

So if you can get into the restaurant at the Wawona Hotel, I encourage you to do so. 

Tunnel View Lookout Yosemite

Stop 3: Tunnel View

A stop at Tunnel View is a must on your way into Yosemite Valley. This is your first opportunity to get those sensational photos you’ve been hoping for.

This view of Yosemite Valley is stunning and probably the most famous viewpoint in the park.

From the lookout at Tunnel View, you can see the massive face of El Capitan on the left, Half Dome jutting up in the distance, and Bridalveil Fall flowing over the high cliffs on the right.

This is the stuff postcards are made of and you are likely to get some of your favorite vacation photos from this location. If you’re an early bird, plan a visit to Tunnel view at sunrise for a truly extraordinary experience. 

Yosemite road trip
Photo by Little NY

Stop 4: Yosemite Valley Lodging

After leaving Tunnel View you will make your way into Yosemite Valley.

Depending on the time of year of your visit, you may experience traffic congestion once you reach the valley floor.

Be patient and just enjoy the view as you drive alongside the roaring Merced River to your Yosemite lodging. 

You’ll have several options for lodging in Yosemite Valley. Here are the most popular Yosemite National Park lodging options:

  • Housekeeping Camp: This is one of the most affordable and most popular Yosemite camping options in the park. These consist of 3 walled camping areas with two beds inside. You will have an outlet or two to plug things in if you need to. There are shared showers and bathrooms a short walk away. A camp location in Housekeeping Camp will cost around $110 per night. 
  • Yosemite Valley Lodge: This is one of the more affordable of the Yosemite hotels and features fully appointed guest rooms with comfortable beds but no air conditioning. Rooms at the Yosemite Valley Lodge average about $280 per night. 
  • Curry Village: The Curry Village area features various accommodation options including regular cabins with private baths, tent cabins with shared baths, and motel rooms. Restroom and shower facilities are just a short walk away. Prices for tent cabins begin around $140 per night and regular Yosemite cabins are closer to $250 per night. 
  • Ahwahnee Hotel: Formerly The Majestic Yosemite Hotel, this is the most luxurious accommodation found in Yosemite Valley. This is a luxury style hotel with well-appointed guest rooms, dining, and heated outdoor swimming pool. Important note, these rooms will cost you between $500 to $600 per night no matter the time of year of your visit. 

If you’d like to avoid the summer crowds and not have to worry about traffic and parking, Yosemite in November is absolutely magical. Plus, you can often get deals on park lodging this time of year.

2017-07-03_18-11-51_656

I strongly encourage you to begin looking for accommodations as soon as you know you will be visiting Yosemite.

Many accommodations will sell out when they go on sale a year in advance. Though, I have snagged a reservation at the last minute on multiple occasions due to cancellations.  

So back to the Yosemite road trip itinerary! Once you’ve gotten settled into your accommodations, let’s head out and explore.

There is tons to see and to in Yosemite Valley. If it’s hot out, put on your swimsuit and grab a towel and let’s head to the river.

Stop 5: The Merced River

Once you get settled into your accommodations for the night, head down to the Merced River.

If you’re looking for a peaceful way to spend the afternoon, grab your swimsuit, water shoes, and towel and head to one of the designated swimming areas.

Be sure to pack a lunch or bring food for the grill. There are plenty of picnic areas along the river. 

If you’re looking for more adventure, there are sections of the river where you can go tubing. I recommend bringing your own tube if you have one.

The park does not always have the rental booth open and sometimes they run out. Make sure you bring the heavy-duty kind meant for rivers, you will get kicked out quickly if you bring a swimming pool float.

Temperatures in Yosemite Valley frequently get into the 90s in the summer, so having a fun way to cool off will be much appreciated. 

Always pay attention to the park rangers when you’re in or near the river. The water can turn from calm to rapids quickly.

There are several rescues made from the Merced River every year and you do not want to be one of them. 

View of El Capitan in Yosemite Valley

Stop 6: Valley Tour to Bridalveil Fall, Yosemite Falls, El Capitan, and Half Dome

After you’ve spent time checking out the Merced River, complete your tour of the main sights in Yosemite Valley.

You can view Bridalveil Fall, Yosemite Falls, El Capitan, and Half Dome by taking a walking tour through the valley.

You can do this on your own or as part of a guided tour. I recommend just walking around on your own so you can explore as you wish and take your time.

You can always join a tour later if you want to know more about the history and features of the park. 

IMG_0896 (1)

Stop 7: Mist Trail to Vernal and Nevada Falls

Another highlight in Yosemite Valley is the Mist Trail. I recommend tackling this hike on the first morning you wake up in the park.

This is one of the most popular hikes in all of Yosemite and for good reason. The path will take you on a steep climb alongside the massive Vernal Falls and Nevada Falls.

You can find the trailhead for this hike at shuttle stop 16 near Happy Isles. You should know that this hike is entirely uphill and very strenuous. Come prepared and be in good shape before you begin. 

To reach the top of Nevada Falls the hike is seven miles round trip and will take about four to five hours.

To reach the top of Vernal Falls, the hike is three miles round trip and will take about two to three hours. If you just want a close up of the falls and not the full hike experience, you can hike up to the Vernal Falls footbridge.

The hike up to the footbridge is two miles round trip and will take between one and two hours. While the footbridge is only a mile up the trail, it is a very steep mile. Be in good shape for this as well. 

Be advised that the trail gets much more difficult once you get beyond the footbridge.

To reach the top of Vernal Falls you will need to climb over 600 stairs with mist from the waterfall spraying you along the way.

Be sure to have plenty of water and proper shoes. As strenuous as this hike is, it’s also one of the most beautiful hikes you’ll ever do. 

If you’re looking for a much easier hike, consider the Mirror Lake hike instead. This one is about 2.4 miles roundtrip and is mostly flat.

Half Dome in Yosemite

Stop 8: Glacier Point

After your long hike on the Mist Trail, it’s the perfect time to hop back in the car and give your legs a rest.

Heading back outside Yosemite Valley, you’ll make your way to Glacier Point, another popular lookout spot.

You can reach Glacier Point from the valley in about one hour. From this lookout, you get one of the best views of Half Dome in the park.

You can also see sections of Yosemite Valley, Yosemite Falls, and parts of the high country. The views here rival those at Tunnel View, so you can bet you’ll get some extraordinary photos.

Crowds can be heavy here in the summer, so I recommend making the drive in the late afternoon when crowds have thinned out. Be careful not to arrive too late though.

As the sun begins to set you’ll get lots of shadows making it challenging to get nice photos. 

When making this drive, please do so safely and keep your eyes on the road. There are lots of deer in this area, especially as you get closer to Glacier Point. 

Hetch Hetchy Reservoir Yosemite ````

Stop 9: Hetch Hetchy Valley and Reservoir

You’ll find the Hetch Hetchy Reservoir about 90 minutes outside of Yosemite Valley along Big Oak Flat Road.

This is a beautiful area of the park perfect for hiking and getting away from the crowds. Despite its incredible beauty, it is not frequently visited by most park visitors.  

Once you’ve arrived in Hetch Hetchy you can go hiking, bird watching, fishing, and backpacking. There are also several points of interest including the O’Shaughnessy Dam, Wapama Fall, and Smith Peak. 

Stop 10: Tuolomne Meadows

Tuolumne Meadows is located on the eastern side of Yosemite and is one of the highlights of your Yosemite road trip.

Here you will find incredible views of the high country, green meadows, pristine lakes, mountains, and miles of hiking trails.

The famous Pacific Crest Trail can be accessed from this part of the park.

In addition, there are dozens of other hikes, of varying length and difficulty that can be accessed off Tioga Pass road.

Soda Springs and Parsons Lodge or Gaylor Lakes are some of the shorter hikes, while Cathedral Lakes, Mono Pass or Glen Aulin are the longer hikes.

If you really want to get out and explore the high country, you can hike to Vogelsang High Sierra Camp.

For those intending to complete these long distance hikes, backpacking gear will be necessary. Be sure to do your research and plan ahead before setting out on these trails.

For those setting out on shorter hikes, be sure to pack a lunch, some snacks, and plenty of water for this trip. You will not find food or drinks along the way.

I also suggest bringing a sweater or jacket. While it’s 90 degrees in Yosemite Valley, temperatures in the high Sierras can get quite cold, even in the summer. 

If you get an early start, you can get to Tuolumne Meadows and back to Yosemite Valley by late afternoon or early evening. 

Details for driving the Tioga Pass to Tuolumne Meadows

To get to Tuolumne Meadows from Yosemite Valley, you need to take the Tioga Pass road. The Tioga Pass is a mountainous stretch of highway running through the high Sierra Nevadas.

This route is only open in the late spring and summer, as it is typically covered in snow the remainder of the year and closed to all traffic.

If you’re fortunate enough to be visiting Yosemite while the Tioga Pass is open, I highly recommend taking the time to see Tuolumne Meadows. 

The drive from Yosemite Valley to Tuolumne Meadows is about 90 minutes without stops.

However, you will not get there in 90 minutes because you will want to stop quite a bit. There are many beautiful lookouts and things to see.

Take your time on your Yosemite road trip and enjoy having this part of the park mostly to yourself. 

Sunrise in Yosemite Valley over lake

Final Night in Yosemite Valley

After returning from your drive out to Tuolumne Meadows you will return to Yosemite Valley.

This is your final night and your last stop on the Ultimate Yosemite Road Trip. Take a walk through the park at sunset before grabbing a healthy dinner.

Then spend a relaxing evening with a cocktail or glass of wine by the fire. If it’s a clear night consider joining the Starry Night Skies Over Yosemite tour that begins at 9:00 p.m. 

Final Thoughts

All of the above stops on the Ultimate Yosemite Road Trip can easily be done in three or four days.

Make all the stops you want as you’re driving around. The best part of any road trip is that there’s no schedule to keep. 

If you prefer to visit Yosemite without all the driving, there are plenty of great Yosemite tours available as well.

They will handle all the details and all the driving so you can just relax and enjoy the park. 

Ideas for Other National Park Road Trips

If you’ve got more time, there are so many other amazing places to visit in the U.S.

If you’re looking for other National Parks trips to take, here are some excellent ideas for National Park road trips on the West Coast of the United States.

  • Sequoia National Park
  • Kings Canyon National Park
  • Zion National Park
  • Yellowstone National Park
  • Grand Teton National Park
  • Monument Valley

Distances to Yosemite National Park from popular nearby destinations

  • San Francisco to Yosemite road trip distance:  4 hours 30 minutes
  • Big Sur to Yosemite road trip distance: 5 hours
  • San Jose to Yosemite road trip distance:  4 hours 10 minutes
  • Los Angeles to Yosemite road trip distance:  6 hours
  • San Diego to Yosemite road trip distance:  8 hours 20 minutes
  • Phoenix to Yosemite road trip distance:  11 hours 30 minutes
  • Seattle to Yosemite road trip distance:  16 hours
  • Grand Canyon to Yosemite road trip distance:  9 hours 45 minutes

If you’d like to try another one of my favorite road trips, consider the Sea to Sky Highway Road Trip in Vancouver, Canada. It’s one of the most beautiful stretches of highway you’ll ever see. 

Related Posts

Yosemite Road Trip

The Ultimate Yosemite Road Trip

Yosemite National Park is located in California along the majestic Sierra Nevada mountains. It’s famous for its massive rock formations, waterfalls, and giant Sequoias. Late …
Read More
Tunnel View Sunrise

How to Catch an Epic Tunnel View Sunrise

Photo by Agaliza If you’re planning a visit to Yosemite National Park, you absolutely must catch a Tunnel View sunrise. Tunnel view Lookout is one of …
Read More
MIrror Lake Yosemite Hike

A Complete Guide to Yosemite’s Mirror Lake Hike

Photo by Cheri Alguire If you’re looking to tackle the Mirror Lake Hike in Yosemite, you’ve come to the right place. I just returned from a …
Read More

Book Your Trip

Find the best flight deals by using Google Flights, then book direct with the airline. This is the search engine I use to compare flights and prices before booking my own trips.

BOOK YOUR ACCOMODATION
I recommend searching for hotels through Booking.com to compare hotels on amenities, location, and price. If you are a member of a hotel’s rewards program, always book direct with the hotel. If you are not loyal to a specific hotel brand, using Booking.com for the best price.

TRAVEL INSURANCE
Travel insurance is more important than ever. For just a few dollars a day you can protect yourself and your trip. I personally use World Nomads, but whomever you choose, don’t skip out on travel insurance. It can literally save you thousands of dollars.

Want to save it? Pin it. 

Yosemite Road Trip
Rock a Little Travel
Eden Fite
Part-time Traveler | Dog Lover | Avoider of Crowds

I help busy people find creative ways to travel more.

Filed Under: Road Trips, United States, Yosemite Tagged With: Yosemite

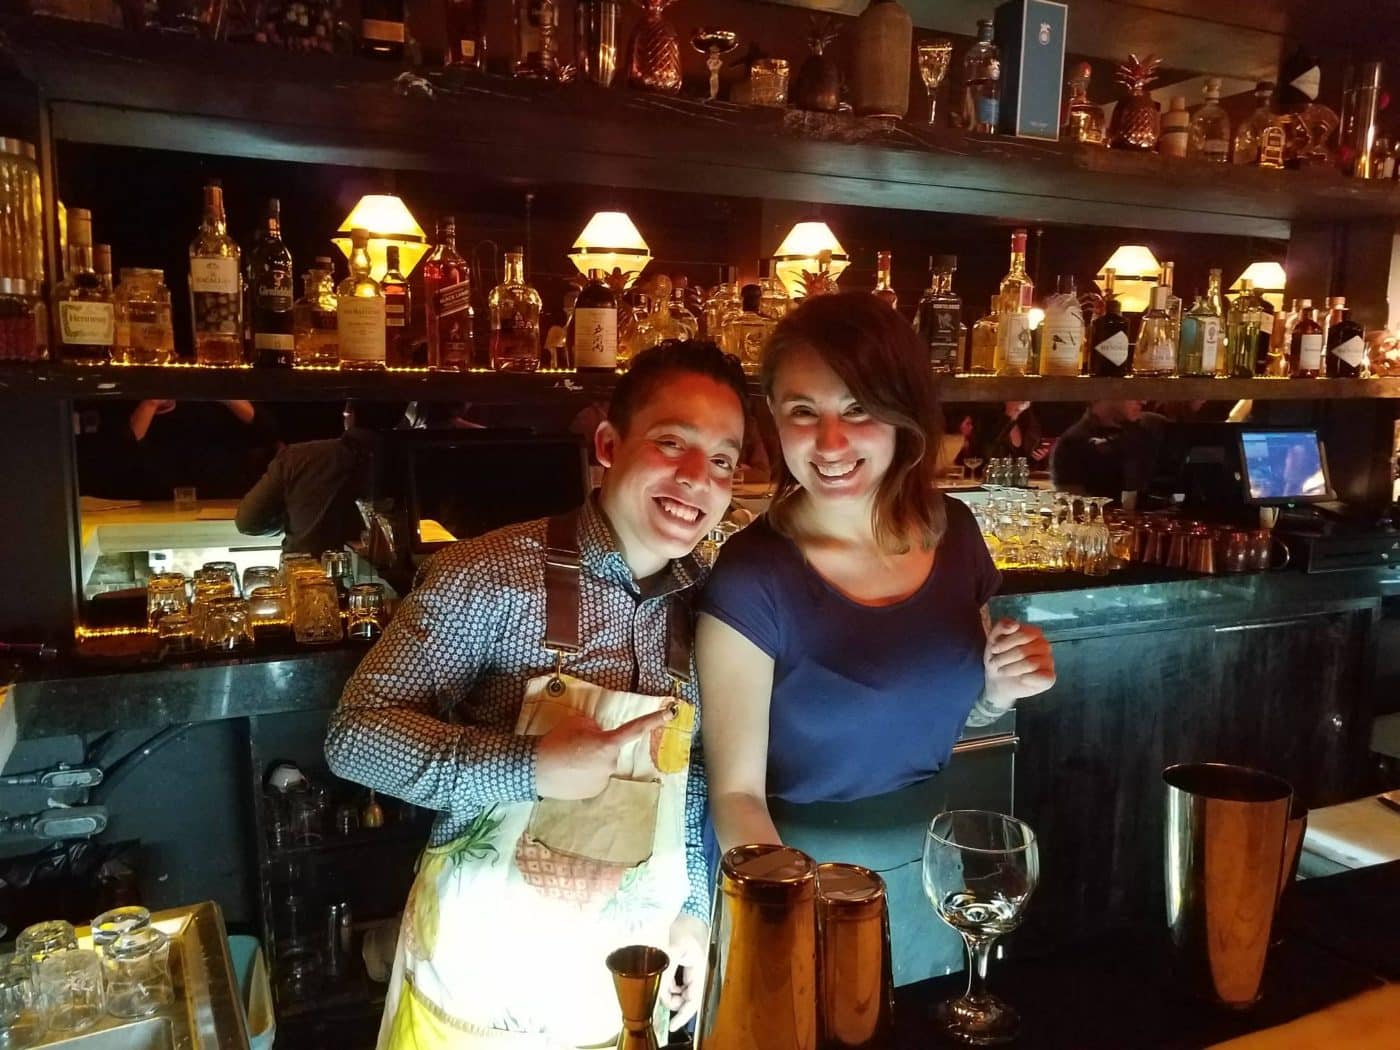
Hanky Panky Mexico City – A Secret Speakeasy

March 30, 2019 By Eden Fite

Hanky Panky Mexico City

Down a dark street in a quiet residential neighborhood, you’ll find one of the best-kept secrets in all of Mexico City. Well, actually you might not find it.

The Hanky Panky bar is in a secret location and I’m not going to tell you where it is. But I will tell you, getting there is half the fun. 

In case you’ve been living under a rock, let me tell you that Mexico City should be immediately moved to the top of your travel bucketlist.

Over the last few years, Mexico City has transformed itself into a world-class destination. The city features vibrant art, one of the hottest music and nightlife scenes in the world, not to mention an exploding culinary scene.

Getting reservations at some of the city’s hottest restaurants or bars will literally take months of advanced planning. 

On a recent visit to Mexico City, the boyfriend and I decided to check out one of the trendiest bars in the city after coming across all of its amazing reviews.

We were able to snag a last-minute reservation at Hanky Panky Mexico City, a speakeasy in the trendy Colonia Juarez neighborhood.

Like any good speakeasy, Hanky Panky is not easy to find. Even with a reservation, you do not receive the address. Instead, you’re given a general idea of where to look.

Hanky Panky Mexico City

Entrance to Hanky Panky

The search for Hanky Panky

With an Uber as our ride, we headed out from the hotel to the Colonia Juarez neighborhood.

With Mexico City being well…Mexico City, we ended up in a traffic jam. This particular traffic jam consisted of hundreds of bikes instead of cars.

There were people on bikes everywhere, zipping in and out of the traffic. We soon found ourselves in an endless sea of bikes, packed tire to tire, handlebar to handlebar.

A scene I can only compare to the starting line of the Tour de France. Yes, I’m exaggerating a little, but to be fair, there really were A LOT of bikes. So much so that our driver had to let us out early because the road in front of us was no longer passable. 

We hopped out of our Uber and took a look around to see if we could spot anything resembling our destination. From the research I did online, I knew we were looking for a pink and blue storefront resembling a taco shop.

After a quick look around, we realized the street we were dropped off on was not where we would find Hanky Panky. There were too much activity and too many people, not at all where you’d find a secret speakeasy. 

We headed off down a dark side street. After a few minutes of walking, we came across a restaurant situated in the middle of a residential block.

I walked in through the gates looking for the taco shop storefront. No luck. We continued on down the block. 

After several more minutes of walking, we came upon another couple headed in the opposite direction.

We inquired if they knew where the intersection was that we were looking for, and they indicated we were headed in the right direction. With renewed confidence, we continued on. 

After several more minutes of walking, we see the pink and blue taco shop storefront across the street about a block ahead of us. We were both relieved and excited. 

Where is Hanky Panky Mexico City?

Well, first of all, you’re going to have to figure that one out for yourself. If I told you, I would take away the adventure of your search and ruin all the fun.

What I will tell you, is that it’s in a residential section of the city near the Zona Rosa neighborhood. It’s in a location where you would least expect it to be.

Once you’ve been confirmed for a reservation, you’ll be given a hint about it’s location, use that information and just trust your instincts. 

Hanky Panky Mexico City Reservations

To obtain a reservation at Hanky Panky you will need to send a message to the host via their Facebook page.

Once you’ve secured yourself a reservation confirmation, you will be provided with information about the whereabouts of the speakeasy.

They will not provide an exact address but will give an approximate location. It will be up to you to do the rest.

I recommend heading out on your hunt for Hanky Panky with plenty of time to spare. You do not want to miss your reservation time if it takes you a while to find the bar.

During my visit, I left about an hour ahead of time to ensure I would have time to get lost. I ended up arriving at the bar about 10 to 15 minutes after my reservation.

They did not give me a hard time for being late, but I wouldn’t push your luck too far. They were not particularly busy the night I went, but it may have been another story if other people were waiting for a table as well. 

Interior of Hanky Panky bar in Mexico City

Inside the Hanky Panky cocktail bar

We walked into the storefront and were immediately greeted by the host. After confirming our reservation, we were led into what appeared to be a small walk-in beer cooler.

As the door closed behind us, we stood briefly in complete darkness. Then, the door opened. 

We stepped out of the darkness into a dimly lit room filled with music and the quiet chatter of several couples.

There were liquor bottles meticulously placed on shelves behind the bar, red leather booths along a back wall and a long wooden wrap-around bar directly in front of us. It’s early, so the bar is not yet packed.

We were seated in bright red leather chairs along the bar. 

The music played at a soft level allowing easy conversation and the ability to appreciate the company of your companion. The crowd was mixed in age and leaned towards the more fashionable.

The two gentlemen next to us at the bar were business travelers also from Los Angeles. A younger couple at the other end of the bar appeared to be local, as they seemed to know the bartender quite well. 

Cocktail at Hanky Panky bar in Mexico City

Hanky Panky cocktails

The cocktails here are made very precisely and with fresh ingredients. For that reason, you will wait a bit longer than expected for your drink to be prepared, but the service is good.

Watching the bartenders at work is part of the experience here. You’ll have plenty of time to strike up a conversation if you’d like to know more about the bar or neighborhood.

My boyfriend really enjoyed talking with the bartenders on the night of our visit and they didn’t seem to mind the distraction.

As for me, I sat quietly, politely smiling back and thinking that I really need to work on my Spanish.

The drinks served here are strong and sophisticated. Think scotch, whiskey, vermouth, and bitters garnished with fresh herbs. All of the above are mixed with exact proportions, allowing each ingredient to complement the mixture in a specific way.

You can taste not only the freshness and quality but the care with which it was made. These drinks are just plain good. 

Take your time to read through the drink menu completely before you order. I suggest you identify your top two choices and start there.

Once you’ve made it through your first two choices, feel free to experiment with the others. Be warned though, you might not make it to the experimenting part depending on your tolerance level. 

For more information about this fantastic little speakeasy click here. Just kidding! I don’t want to spoil your fun…or theirs. You’re going to have to figure this one out for yourself. Good luck. 

Hanky Panky Mexico City Review

Overall my Hanky Panky Mexico City experience was a delightful adventure. I found the cocktails to be both unique and delicious and the bartenders were really friendly.

I can honestly say I enjoyed the search as much as I enjoyed the bar and drinks. In fact, this might now be my favorite bar in the city and I wish I could find a similar experience back in the United States.

This was such a unique and fun way to experience some of what Mexico City has to offer. I strongly recommend you seek out a similar adventure on your trip as well.

I imagine by the time you read this, the internet will have already revealed the exact location of Hanky Panky, so there may be a little less adventure to your visit.

However, with a little effort and planning ahead of time, you should be able to snag yourself a reservation. Trust me, it’s well worth the effort. Hanky Panky is a remarkable way to spend an evening in Mexico City. 

Hanky Panky Mexico City Hours

Hanky Panky is open Tuesday through Sunday from 6:30 p.m. to 2:00 a.m. They are closed on Mondays. 

If you’re looking for more fun things to do during your visit to Mexico City, check out the Top Things to See and Do in Mexico City. 

Book Your Trip

Find the best flight deals by using Google Flights, then book direct with the airline. This is the search engine I use to compare flights and prices before booking my own trips.

BOOK YOUR ACCOMODATION
I recommend searching for hotels through Booking.com to compare hotels on amenities, location, and price. If you are a member of a hotel’s rewards program, always book direct with the hotel. If you are not loyal to a specific hotel brand, using Booking.com for the best price.

TRAVEL INSURANCE
Travel insurance is more important than ever. For just a few dollars a day you can protect yourself and your trip. I personally use World Nomads, but whomever you choose, don’t skip out on travel insurance. It can literally save you thousands of dollars.

Want to save it? Pin it. 

Hanky Panky Mexico City - A Secret Speakeasy Pinterest pin

Related Posts

Izamal Mexico

10 Best Day Trips from Merida

The best day trips from Merida will take you all over Mexico’s vibrant Yucatan Peninsula. From the Yucatan’s white sandy beaches to its abundance of …
Read More
Things to do in Merida Mexico

12 Things to do in Merida Mexico

The best things to do in Merida Mexico can all be enjoyed with just a few days in this beautiful, vibrant city. Merida is located …
Read More
Cancun Travel Tips

Top 10 Cancun Travel Tips for First Time Visitors

If you’ve never been to Cancun before, then these Top 10 Cancun Travel Tips are for you. Having just returned from my own two week …
Read More
Rock a Little Travel
Eden Fite
Part-time Traveler | Dog Lover | Avoider of Crowds

I help busy people find creative ways to travel more.

Filed Under: Mexico

The Ultimate Trastevere Guide

March 7, 2019 By Eden Fite

Trastevere, Rome, Italy
Photo by Photo Beto

Is Trastevere worth visiting? You better believe it is. In fact, it’s my favorite neighborhood in Rome and why I wanted to create this Trastevere guide.

It’s easy to fall in love with Rome for many reasons, but spending time in the local neighborhoods certainly helps.

The Trastevere neighborhood is charming and peaceful and home to some of the prettiest streets in the city.

Like many neighborhoods in the Eternal City, it’s roads are narrow and cobblestone.

The walls of apartments and restaurants all painted a pale yellow. Dark green, leafy plants decorate the many outdoor patios. 

During the day Trastevere is fairly quiet, at least as compared to what’s going on across the river in Rome’s Historic Center.

This makes Trastevere the perfect place to stay if you need a break from the crowds.

It’s also the ideal place to take a walk and get to know another side of Rome.

The architecture and aesthetic of Trastevere is different from the rest of the city, having its own unique character.

To help you explore the beautiful streets of this lovely neighborhood, I’ve put together this Trastevere guide so you don’t miss a thing. 

The Ultimate Trastevere Guide

View of Trastevere across the Riber in Rome

Where is Trastevere

The Trastevere neighborhood in Rome sits to the west of the Tiber River and south of Vatican City.

Its location is perfect, just close enough to the Historic Center and Ancient Rome to be within about a 20 minute walk. Yet far enough away to remain off the radar of most tourists. 

Trastevere Rome is the perfect city to explore on foot, so if you prefer to walk everywhere, you can take day trips to both the Colosseum or the Vatican in about 35 minutes on foot.

If you prefer to minimize the walking a bit, you can also get around town via Uber or public transportation.

There is a streetcar that runs along the main road in Trastevere that will take you back across the river to Rome’s Historic Center.

Look for Tram 8 along Via di Trastevere, there are several stops where you can catch the tram.

There are also taxi stands scattered throughout the neighborhood that can get you wherever you need to go if you’re in a hurry. 

A guide to Rome's Trastevere neighborhood

When to visit Trastevere

Like the rest of Italy and Rome, I recommend visiting the Trastevere neighborhood outside of the peak tourist season in June and July.

I think you’ll have a more enjoyable time visiting during the shoulder season from March to May and September to November.

Things to see in Trastevere

Most of the items in this Trastevere guide are free things that you can see and visit as you explore the neighborhood.

Trastevere is very walkable, so most will not need to use a taxi or bus to get from place to place.

You should have more than enough time to complete the full itinerary, even with just a few hours.

So whether you have 4 days in Rome or you’re just visiting for the weekend, you don’t want to miss Trastevere.

One of the main reasons to visit Trastevere is to enjoy the atmosphere and beauty of the neighborhood.

I recommend spending some time just walking through the streets and seeing what you find.

This Trastevere guide includes brief descriptions of some of the neighborhood’s main attractions and points of interest.

As you’re walking around, here are a few places you might like to visit.

Via Della Lungaretta

Via Della Lungaretta, not to be confused with the nearby Via Della Lungara, is one of the main streets in Trastevere.

Lined along each side of the street you’ll find cafes, restaurants, bars, and shops.

This is a great spot to find lunch or dinner when you get hungry and to get a feel for the neighborhood.

Walking along this street will lead you straight to the popular Piazza Santa Maria.

Piazza Santa Maria, Trastevere, Rome, Italy
Photo by Kirk Fisher

Piazza Santa Maria

Piazza di Santa Maria is the center of the Trastevere neighborhood.

You will find the Piazza surrounded by restaurants and cafes, with a large fountain in the middle. Grab yourself a gelato and take a seat on the steps of the fountain with the locals.

This is the perfect place for people watching and to take a break from all that walking around.  

Trastevere guide
Photo by Pixabay

Basilica of Santa Maria

The Basilica of Santa Maria is located in the Piazza Santa Maria. It is one of the oldest churches in Rome, with parts of the structure dating back to the 340s.

There are also important mosaics from the late 13 century from Pietro Cavallini on display inside.

Visitors may enter the Basilica at any time, there is no fee to enter.

Palazzo Corsini

You can find Palazzo Corsini about a 7-minute walk from the Basilica of Santa Maria. This is a baroque style palace constructed in the mid-1700s.

Inside you will find the Corsini Gallery which houses dozens of paintings from Italian artists from the early Renaissance through the late 18th century. 

Trastevere Guide
Photo by Valerio Mei

Orto Botanica

Located just around the corner from Palazzo Corsini is the Orto Botanico, or botanical garden.

The botanical gardens house more than 3,000 plant species including a Japanese garden and bamboo groves.

This is the perfect place to walk around and get some fun pictures as some of the plants and flower arrangements are quite beautiful.

Once you’ve finished looking around Orto Botanica, head outside.

Around the back of the Orto Botanica, you’ll find Giancolo hill. The climb to the top will take you about 20 minutes, but it’s totally worth it. 

From the top of the hill you’ll have beautiful views of the surrounding city. It’s the perfect spot to be at sunset if you can time it right.

Cosimato Food Market, Trastevere, Rome, Italy

San Cosimato Market

San Cosimato Market is a local farmer’s market with stalls selling fresh fruits and vegetables, local cheese and meats, oils and vinegar, and many other items.

This is a wonderful place to go to if you happen to be renting an apartment in the area instead of staying in a hotel.

You can shop like the locals do and pick up your groceries each day.

The market has some interesting history and has existed for hundreds of years.

Many of the vendors selling in the market today are descendants of the original vendors. If you’re looking to eat where the locals do, this is surely the place to do it.

As an added bonus, eating here can save you a ton of money if you’re on a budget. It’ll be far less expensive than eating out at restaurants every day.

Plus you’ll get to enjoy high-quality local products. You’re in Italy after all, you’re bound to eat well.

Villa Farnesina
Photo by SJ Haytov

Villa Farnesina

The Villa Farnesina is a Renaissance-era suburban villa in the Trastevere neighborhood.

The villa was built back between 1506 and 1510 for Agostino Chigi, the former treasurer for Pope Julius II.

Chigi commissioned fresco paintings by Raphael and several other famous Italian artists.

Raphael’s famous frescoes Cupid and Psyche and The Triumph of Galatea can be found on the ground floor of the villa.

Visitors are welcome to visit villa from Monday to Saturday from 9:00 a.m. to 2:00 p.m. Admission is 10 Euro per person.

Santa Cecilia, Rome, Italy
Photo by e55evu

Santa Cecilia

Santa Cecilia is a 5th-century church in Rome’s Trastevere neighborhood. The church is dedicated to Roman martyr Saint Cecilia, who is believed to have been beheaded with a sword.

Back in the 3rd Century, a church was built on the site of Saint Cecilia’s former home. The remnants of this former church have been found during excavations in the current one.

Today, a community of Benedictine nuns who live in a monastery next door, are in charge of the basilica.

Visitors are welcome to visit the church when religious services are not being held. There is no cost for entrance.

Trastevere, Rome, Italy
Photo by Pixabay

Piazza Trilussa

Piazza Trilussa is another public square and a popular spot for locals to hang out or meet up with one another.

At the center of the square is the elegant Ponte Sisto Fountain.

The square is found adjacent to the Tiber River and pedestrian bridge.

After you’re finished exploring the neighborhood attractions, be sure to save time to try one of the local restaurants.

You’ll find some of the best Italian food in Rome right here in Trastevere. 

Trastevere Restaurants

No Trastevere guide would be complete without mentioning the restaurants and the food.

The true measure of any neighborhood is it’s proximity to great food and drinks. This is where Trastevere truly shines.

The neighborhood is known for its’ many restaurants and bars serving both traditional Roman cuisine and international cuisine.

It is the coveted evening destination for locals and tourists alike. If you’re lucky enough to get to experience a night out in Rome, this is the place to do it.

Here are some of the most popular restaurants in Trastevere.

Popular Trastevere Restaurants

  • Le Mani in Pasta: The reviews for Le Mani in Pasta are always fantastic. Make reservations ahead of time if you plan to try to eat here. You can usually call a day or two before and they will try to squeeze you in. The carbonara pasta is here is very popular. 
  • Spirito DiVino: This is one of the only slow food restaurants in Rome. They serve delicious fresh food, paired with some of the best wine you’ll ever have. Sampling the cheese plate here is a must. 
  • Da Enzo al 29: One of the most popular restaurants in Trastevere, and in Rome. Da Enzo 29 is a small trattoria that serves some of the best Roman cuisine you can find. Definitely make a reservation if you plan to eat here for dinner. If you prefer to try your luck for lunch, arrive around noon to queue up and you should get a table after a short wait. Order the Cacio e Pepe and Tiramisu. 
  • Ai Marmi: The best pizza in Rome (my opinion!). Ai Marmi is open late and is the perfect stop on your way home from having cocktails. In addition to having some of the best pizza I’ve ever had in my life, they also have really good appetizers and small plates. If you’re looking for something a bit lighter, order the bruschetta.
  • La Tavernaccia Da Bruno: This trattoria serves both Roman and Umbrian cuisine. While their pasta dishes are fantastic, this restaurant is known for its meat dishes. Try the wild boar pasta and suckling pig. Reservations for La Tavernaccia Da Bruno can be made online by visiting their website. 

If you’re not in the mood for Italian, you’ll find plenty of other options in Trastevere as well.

There’s even a great taco place called Pico’s Taqueria that serves delicious al pastor tacos and perfectly spicy salsa.

For those wanting to experience as much of the food scene in Trastevere as possible, a group food tour is also available. Though you can always make your own as well.

3 colorful cocktails on a table

Trastevere Bars

In addition to being home to many of Rome’s top restaurants, Trastevere’s nightlife scene is also buzzing.

You’ll find plenty of places to grab a cocktail or beer and catch up with friends, or even make new ones. There are dozens of bars and pubs in Trastevere, from sophisticated to casual.

Here’s a list of some of the top spots to find cocktails and beer in Trastevere:

  • Niji Cafe: Cozy bar with friendly service and creative craft cocktails. 
  • Freni e Frizioni: Lively bar with a popular terrace. They serve cocktails and aperitivos surrounded by chandeliers and modern art. This is a fun place to be any night of the week. 
  • Ma Che Venuti a Fa: One of the most popular and fun beer bars in the city serving a great mix of beers from around the world, 
Cup of espresso

Trastevere Coffee

I couldn’t write a Trastevere guide without bringing up the coffee. Italy is home to some of the best coffee on the planet. 

In Italy, the coffee shops are called bars. There are coffee bars scattered all around Trastevere. You can find them by simply walking around the neighborhood in the morning. 

You should also know that Italians don’t order their coffee to go, they order an espresso or a cappuccino and drink it while standing at the counter in the bar. 

There will be sugar on the counter if you need it.

The coffee bars also serve local pastries which are perfect for dipping in your cappuccino.

Your coffee will only cost one or two Euros, and you can leave a small tip if you like. 

The coffee that I found in Trastevere was the best coffee I had while I was in Italy. Quite possibly, the best coffee I’ve ever had in my life.

Try as I might, I was unable to find any other place quite like it during my time in Italy. Just another example of the many gifts you’ll find in Trastevere. 

Photo of Relais le Clarisse in Rome

Trastevere Hotels

There are many charming Trastevere hotels and apartments that will make a great home base while you’re exploring Rome.

Many of these hotels are just a short 5 minute walk to most of the attractions in the neighborhood listed above.

Here is a shortlist of some of my favorite Trastevere hotels:

  • Relais le Clarisse: This hotel was converted from religious housing originally built in the 12 century. The hotel features a beautiful courtyard where breakfast is served every morning. 
  • Domus Monami: This hotel features elegantly furnished spacious rooms and free breakfast each morning. 
  • Hotel Donna Camilla Savelli: This is a beautiful hotel with 78 well-appointed guest rooms. Breakfast is served each morning in the hotel’s garden. 
  • Bounanotte Garibaldi: The Buonanotte Garibaldi is a luxury Bed and Breakfast that was formerly the Fiber Art Studio. The property is intimate, with only three rooms. Breakfast is served each morning on the patio. 
  • Hotel Ponte Sisto: A beautiful 4-star hotel located in Trastevere near the Tiber River. The hotel features well-appointed and spacious rooms. The hotel has several dining areas and a rooftop top terrace.
Booking.com

I hope you’ve found this Trastevere guide useful and that you love Rome as much as I did.

If you’re planning on visiting any other cities while you’re in the country, consider checking out my other Italy itineraries: Naples in a Day, Florence in a Day, or Venice in a Day.

If you liked this Trastevere guide please consider sharing it. It really help me a lot.

Book Your Trip

Find the best flight deals by using Google Flights, then book direct with the airline. This is the search engine I use to compare flights and prices before booking my own trips.

BOOK YOUR ACCOMODATION
I recommend searching for hotels through Booking.com to compare hotels on amenities, location, and price. If you are a member of a hotel’s rewards program, always book direct with the hotel. If you are not loyal to a specific hotel brand, using Booking.com for the best price.

TRAVEL INSURANCE
Travel insurance is more important than ever. For just a few dollars a day you can protect yourself and your trip. I personally use World Nomads, but whomever you choose, don’t skip out on travel insurance. It can literally save you thousands of dollars.

Want to save it? Pin in. 

Trastavere

Related Posts

Trastevere, Rome, Italy

The Ultimate Trastevere Guide

Photo by Photo Beto Is Trastevere worth visiting? You better believe it is. In fact, it’s my favorite neighborhood in Rome and why I wanted to …
Read More
Florence in a Day

How to Enjoy Florence in a Day

Want to know if it’s possible to see Florence in a day? Keep reading. While I think anyone could easily spend a week here and not …
Read More
Venice in a Day

How to Experience Venice in a Day

Venice is such an incredibly distinct place, there really is nowhere else quite like it. During my recent visit to this fun floating city, my …
Read More
Rock a Little Travel
Eden Fite
Part-time Traveler | Dog Lover | Avoider of Crowds

I help busy people find creative ways to travel more.

Filed Under: Italy Tagged With: Rome, Trastevere

« Previous Page
Next Page »

Primary Sidebar

Hi, I’m Eden

Profile Image

Tagline

search

Follow me on social media

Sedona Road Trip

The Ultimate Phoenix to Sedona Road Trip Itinerary

Yosemite Road Trip

The Ultimate Yosemite Road Trip

Why is travel insurance important (1) rights reserved

5 Reasons Why Travel Insurance is Important

Copyright © 2022 Rock a Little Travel